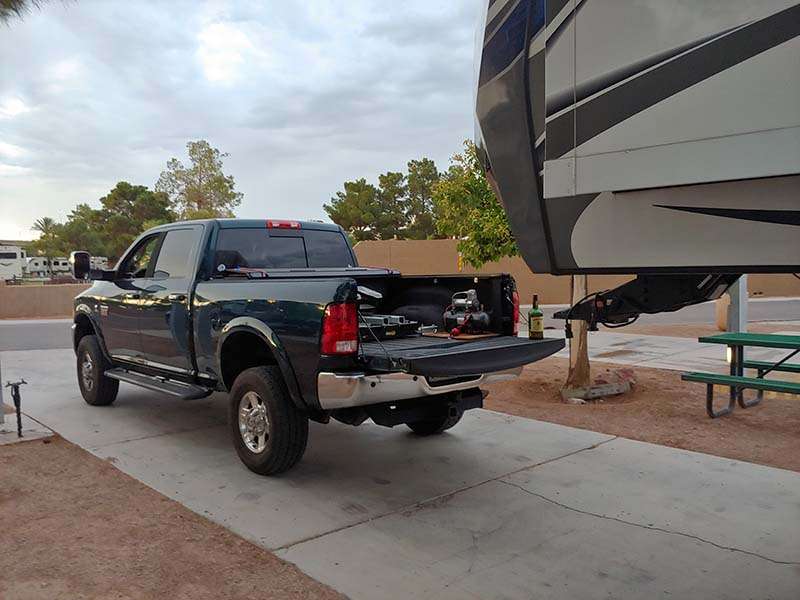
August meant it was time again for the annual Vegas trip.
. I killed it at craps, and Matt at the giant Wheel of Fortune machine. As usual, pai gow was a slow, losing battle. Corey and I posted up at a roulette table while we were waiting for the crowd to thin out elsewhere. Three times we caught the dealer (wheeler?) clearing his chips off a square
had won - pretty darn sketchy. For the rest of the weekend the name Roger was a synonymous with infamy.
The huge Bass Pro was a sight to behold, but if their off-brand side-by-sides didn't drive me away, their acceptance of open carry in their place of business did. Hanging out at the fish tank and seeing the occasional mermaid was way better.
on Tropicana. It was like a trip back to the 90s.
... only to find they go all Castlevania on you and
It wasn't reachable at the time, but there are a couple well-situated palm trees for another shoot.
The RoR ranks have been growing beyond the core group. I actually stumbled on good tactic:

Soldier's Syringe
|
Increases attack speed by 15%. (+15% per stack).
|
Commando/MUL-T/Huntress/Mercenary/Rex:
This is almost completely wasted on the artificer and engineer.
|

Tougher Times
|
15% (+15% per stack) chance to block incoming damage. Unaffected by the luck.
|
Any:
Everyone needs to not get hit, though it's obviously better for tanks.
|

Monster Tooth
|
Killing an enemy spawns a healing orb that heals for 6 (+6 per stack) health.
|
Mercenary/Engineer/Artificer/Rex:
Front line classes benefit from health drops more, especially Rex.
|

Lens-Maker's Glasses
|
Your attacks have a 10% (+10% per stack) chance to 'Critically Strike', dealing double damage.
|
Commando/MUL-T/Huntress/Engineer:
I'd tend toward giving the high range/fire rate units the critical effects (or engineer for his turrets).
|

Paul's Goat Hoof
|
Increases movement speed by 14% (+14% per stack).
|
Any:
Everyone needs movement speed, especially tanks.
|

Bustling Fungus
|
After standing still for 2 seconds, create a zone that heals for 4.5% (+2.25% per stack) of your health every second to all allies within 3m (+1.5m per stack).
|
Engineer:
If you give this to anyone other than the engineer it's just 3D printer fodder. Standing still is never a good idea unless you're a turret.
|

Crowbar
|
Deal 150% (+30% per stack) damage to enemies above 90% health.
|
Any:
Whoever's doing crowd control since this is really only good at smashing squishies.
|

Tri-Tip Dagger
|
15% (+15% per stack) chance to bleed an enemy for 240% base damage.
|
Commando/Huntress/Engineer/Artificer:
Characters that spread the damage around or need to attack from distance benefit most from causing a bleed effect.
|

War Banner
|
On level up drop a banner that strengthens all allies within 16m (+8m per stack). Raise attack and movement speed by 30%
|
Any:
Typically with one stack per character to maximize the likelihood of dropping a banner near the portal. The engineer should be the first to get a banner since he can drop his turrets and shield bubble in it.
|

Cautious Slug
|
Increases passive health regeneration by 250% (+150% per stack) while outside of combat.
|
Commando/Huntress:
Since commando and huntress are most frequently attacking from range, they'd actually use the effect of the nutsack.
|

Personal Shield Generator
|
Gain a 25 (+25 per stack) health shield. Recharges outside of danger.
|
MUL-T/Mercenary/Engineer/Artificer/Rex:
Best for tanky units.
|

Medkit
|
Heal for 10 (+10 per stack) health 1.1 seconds after getting hurt.
|
Rex:
Pairs well with Rex's tendency to self-harm.
|

Gasoline
|
Killing an enemy ignites all enemies within 12m (+4m per stack). Enemies burn for 150% (+75% per stack) base damage
|
MUL-T/Huntress/Engineer/Rex:
Best for the crowd control build that's taking down squishies.
|

Stun Grenade
|
5% (+5% per stack) chance on hit to stun enemies for 2 seconds.
|
Commando/MUL-T/Huntress/Mercenary/Engineer:
Better for high fire rate, pair with the syringe.
|

Bundle of Fireworks
|
Opening a chest launches 8 (+4 per stack) fireworks that deal 300% base damage.
|
Any:
Just save the boxes around the teleporter for whoever has fireworks.
|

Energy Drink
|
Sprint speed is improved by 30% (+20% per stack).
|
Any:
Like the goat hoof, everyone needs sprint speed.
|

Backup Magazine
|
Add +1 (+1 per stack) charge of your secondary skill.
|
Commando/MUL-T/Huntress/Artificer:
These classes have worthwhile second skills.
|

Sticky Bomb
|
5% (+2.5% per stack) chance on hit to attach a bomb to an enemy, detonating for 180% damage.
|
Commando/MUL-T/Engineer:
Fire rate ftw.
|

Rusted Key
|
A hidden cache containing an item will appear in a random location in each stage. Increases rarity of the item per stack.
|
Any:
Anyone can pick up a rusted key and use it at a 3d printer.
|

Armor-Piercing Rounds
|
Deal an additional 20% (+20% per stack) damage to bosses.
|
Commando/Huntress/Artificer:
Good for the DPS build.
|

Old Guillotine
|
Instantly kill Elite monsters below 20% (+5% per stack) health.
|
MUL-T/Mercenary/Engineer/Artificer:
Good for the close range characters.
|

Topaz Brooch
|
Gain a temporary barrier on kill.
|
MUL-T/Engineer/Artificer/Rex: Best used on low-mobility tanks that will be focused on crowd control but taking a lot of boss hits.
|

AtG Missile Mk. 1
|
10% chance to fire a missile that deals 300% (+300% per stack) damage.
|
Commando/MUL-T/Huntress:
Fire rate obviously wins here, characters that can attack from afar also benefit from having this more than other classes.
|

Will-o'-the-wisp
|
On killing an enemy, spawn a lava pillar in a 12m (+2.4m per stack) radius for 350% (+280% per stack) base damage.
|
MUL-T/Mercenary/Engineer/Rex:
Close-range crowd control build.
|

Hopoo Feather
|
Gain +1 (+1 per stack) maximum jump count.
|
Any:
Everyone needs one or two of these.
|

Ukulele
|
25% chance to fire chain lightning for 80% damage on up to 3 (+2 per stack) targets within 20m (+2m per stack).
|
MUL-T/Mercenary/Engineer:
Close range, high rate of fire.
|

Leeching Seed
|
Dealing damage heals you for 1 (+1 per stack) health.
|
Any:
Everyone needs as many leeching seeds as possible.
|

Predatory Instincts
|
Critical strikes increase attack speed by 10%. Maximum cap of 30% (+30% per stack) attack speed.
|
Any:
But best deferred to whoever has the crit glasses.
|

Red Whip
|
Leaving combat boosts your movement speed by 30% (+30% per stack).
|
Any:
And of course this helps most with the low-mobility units.
|

Old War Stealthkit
|
Chance on taking damage to gain 40% movement speed and invisibility for 3s (+1.5s per stack). Chance increases the more damage you take.
|
Any:
Even the ranged characters benefit from this almost as much as the tanks.
|

Harvester's Scythe
|
Gain 5% critical chance. Critical strikes heal for 8 (+4 per stack) health.
|
Any:
Best given to the DPS/crit-focused character.
|

Fuel Cell
|
Hold an additional equipment charge (+1 per stack). Reduce equipment cooldown by 15% (+15% per stack).
|
Any:
Best given based on the equipment.
|

Infusion
|
Killing an enemy increases your health permanently by 1, up to a maximum of 100 (+100 per stack) health.
|
Any:
Everyone needs health, even the ranged units.
|

Bandolier
|
18% (+10% per stack) chance on kill to drop an ammo pack that resets all cooldowns.
|
Engineer:
The engineer is most likely to be in the thick of things and benefits significantly from a refreshed shield bubble. Glaive resets for the huntress are very useful, but it's better if she dashes through the action to pick up ammo packs.
|

Berzerker's Pauldron
|
Killing 3 enemies within 1 second sends you into a frenzy for 6s (+4s per stack). Increases movement speed by 50% and attack speed by 100%.
|
Commando/MUL-T/Huntress:
Best used by characters that benefit from a high fire rate.
|

Rose Buckler
|
Increases armor by 30 (+30 per stack) while sprinting.
|
Commando/Huntress:
The sprintiest units.
|

Runald's Band
|
8% chance on hit to strike an enemy with a runic ice blast, slowing them by 80% and dealing 250% damage (+125% per stack).
|
Any:
Useful for everyone, slight bias toward fire rate.
|

Kjaro's Band
|
8% chance on hit to strike an enemy with a runic flame tornado, dealing 500% damage (+250% per stack).
|
Any:
Useful for everyone, slight bias toward fire rate.
|

Chronobauble
|
Slow enemies on hit for -60% movement speed for 2s (+2s per stack).
|
Engineer:
Fantastic for crowd control that comes from three sources.
|

Wax Quail
|
Jumping while sprinting boosts you forward by 10m (+10m per stack).
|
None:
Why would anyone ever want this?
|

War Horn
|
Activating an equipment gives the holder +70% attack speed for 8 seconds (+4s per stack).
|
Commando/MUL-T/Huntress:
Attack speed classes.
|

Aegis
|
Healing past full grants you a temporary barrier for up to 20% (+20% per stack) of your maximum health
|
Engineer:
Combines wonderfully with healing shrooms on the turrets.
|

Brilliant Behemoth
|
All your attacks explode in a 4m (+1.5m per stack) radius for a bonus 60% damage to nearby enemies.
|
MUL-T/Engineer/Rex:
Who wouldn't want exploding attacks? Best for the crowd control build, obviously.
|

Ceremonial Dagger
|
Killing an enemy releases 3 homing daggers that deal 150% (+150% per stack) base damage.
|
MUL-T/Engineer/Rex:
Another great item for the crowd control build.
|

Frost Relic
|
Killing an enemy surrounds you with 3 icicles that deal 3x33% damage.
|
MUL-T/Mercenary/Engineer/Rex:
Good for tanks, although this item seems to slow you when it procs.
|

Happiest Mask
|
Killing enemies has a 10% chance to spawn a ghost of the killed enemy with 500% damage. Lasts 30s (+30s per stack).
|
MUL-T/Engineer/Rex:
Crowd control.
|

H3AD-5T v2
|
Increases jump height. Creates a 10m kinetic explosion on hitting the ground, dealing 2300% base damage that scales up with speed. Recharges in 10 (-50% per stack) seconds.
|
Commando:
Anyone can use this, but it fits the commando's play style the most.
|

N'Kuhana's Opinion
|
Store 100% (+100% per stack) of healing as Soul Energy. After your Soul Energy reaches 10% of your maximum health, fire a skull that deals 250% of your Soul Energy as damage.
|
Engineer:
Another heal turret synergy.
|

Unstable Tesla Coil
|
Fire out lightning that hits 3 (+3 per stack) enemies for 200% base damage every 0.5 seconds. The Tesla Coil switches off every 10 seconds.
|
Mercenary:
Quite a bit of fun for everyone, but best suited for the melee class.
|

57 Leaf Clover
|
All random effects are rolled +1 (+1 per stack) times for a favorable outcome.
|
Any:
Everyone needs luck.
|

Sentient Meat Hook
|
20% (+20% per stack) chance on hit to fire homing hooks at up to 10 (+5 per stack) enemies for 100% damage.
|
Any:
Though best for high fire rate.
|

Alien Head
|
Reduces skill cooldowns by 25% (+25% per stack).
|
Huntress/Mercenary/Engineer:
For high-impact skills and long cooldowns.
|

Soulbound Catalyst
|
Kills reduce equipment cooldown by 4s (+2 seconds per stack)
|
Huntress:
Good for the crowd control build, but constant glaives really makes the huntress shine.
|

Dio's Best Friend
|
Upon death, this item will be consumed and you will return to life with 3 seconds of invulnerability.
|
Any:
Everyone dies.
|

Hardlight Afterburner
|
Add +2 (+2 per stack) charges of your Utility skill. Reduces Utility skill cooldown by 33%.
|
Engineer:
Shield bubble is simply the most useful utility skill.
|

Wake of Vultures
|
Gain the power of any killed elite monster for 8s (+5s per stack).
|
Any:
But pair it with guillotines.
|

Brainstalks
|
Skills have no cooldowns for 3s upon killing an elite monster. (+2s per stack).
|
Commando/MUL-T/Huntress/Mercenary/Artificer:
Best for classes that have spammable skills.
|

Rejuvenation Rack
|
Heal +100% (+100% per stack) more.
|
Any:
Characters that will be around healing turrets are good candidates, but at some point everyone will have a leeching seed or other healing method.
|

Titanic Knurl
|
Increases maximum health by 40 (+40 per stack) and health regeneration by 1.6 (+1.6 per stack) health/second.
|
Engineer:
Triple the benefit. Everyone can use this, but let the turrets tank for you.
|

Queen's Gland
|
Every 30s, summon a Beetle Guard with bonus 300% damage and 100% health. Can have up to 1 (+1 per stack) Guards at a time.
|
Any:
Everyone wants a beetle buddy.
|

Halcyon Seed
|
Summon Aurelionite during the teleporter event. It has 100% (+50% per stack) damage and 100% (+100% per stack) health.
|
Any:
I don't know if these are pooled, but just to be on the safe side, give them all to one player.
|

Little Disciple
|
Fire a tracking wisp for 100% (+100% per stack) damage. Fires every 0.5 seconds while sprinting
|
Huntress/Mercenary:
The characters that sprint the most.
|

Shaped Glass
|
Increase base damage by 100% (+100% per stack). Reduce current health by 50% (50% per stack).
|
Commando/Engineer:
This can be viable for anyone with the right build, but the commando's infinite range and engineer's healing builds make them the strongest candidates.
|

Brittle Crown
|
30% chance on hit to gain 3 (+3 per stack) gold. Lose gold equal to 100%(+100% per stack) of amount you are hit for OR lose % gold equal to 100%(+100 per stack) maximum health % you lost. Chooses the greater of the two.
|
None:
Never wear the crown.
|

Transcendence
|
Convert all but 1 health into regenerating shields. (shields regenerate faster than base health regen) Gain 50% (+25% per stack) maximum health.
|
Commando/Huntress/Mercenary:
Best for the hit and run classes.
|

Corpsebloom
|
Heal +100% (+100% per stack) more. All healing is applied over time. Can heal for a maximum of 10% (reduced by 50% per stack) of your health per second.
|
Any:
Probably best for ranged builds.
|

Gesture of the Drowned
|
Reduce Equipment cooldown by 50% (+15% per stack). Forces your Equipment to activate whenever it is off cooldown.
|
Any:
Equipment-dependent, but can be useful for the close quarters characters.
|
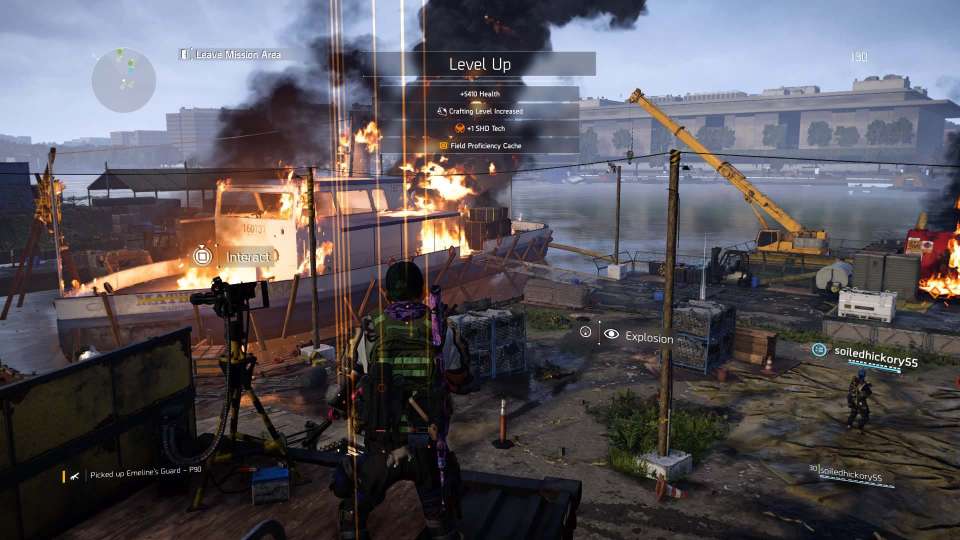
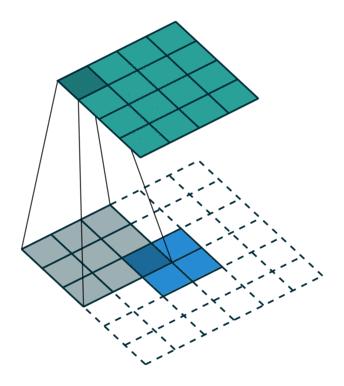
a bit more. Still unable to properly hook up convolutional layers, non-convolutional layers, and transpose convolutional layers, I experimented with a pseudo-convolution wherein I'd try to
to - for example - fill in the blank. To optimize this, I used concentric input/output areas to maximize locality and minimize variables.
, but forget them on the next training set. I wasn't sure if it was a matter of undertraining, overfitting, activation type, loss, or simply that nonconvolutional networks can't learn in a position-independent way.
. This was in the vein of what I'd been experimenting with. It was in Python, so I decided it was high time to check out
Yeah, Python package management was quite a bit easier than Maven. An underengineered Python solution and an overengineered Java solution, way to play into stereotypes, guys. Both solutions offer a pretty simple initial interface to an expansive code base, most of the work goes into the image <-> matrix code.
Stepping back briefly to the colorizer example, it includes a neat tidbit where the network uses the
(luminance, difference to blue, difference to red). Depending on application, YCbCr could take a lot of guesswork away from a model. Running the example code, it became obvious that Keras works pretty hard to make layers work together (e.g. dense and convolutional) and this is to the benefit and detriment of the user.
This led to participating in a programming challenge that was a good learning experience. The project was to
. The winner ultimately used a GAN - generative-adversarial network where one network produces a guess and another network tells it if it's generated a flower or not. The winning network had something like tens of millions of weights, so there was no way I could compete with the neural knowledge or compute horsepower.
Of course, it's impossible to research transpose convolution without seeing the above gif and have someone wring their hands over how it's *not* deconvolution. But the best resource I found was
that also covers some of the math that helps prevent artifacts from being generated by this technique.
Etc.


![[+]](https://www.chrisritchie.org/kilroy/archive/2019/06/ror2_beetle_queen.jpg)
![[+]](https://www.chrisritchie.org/kilroy/archive/2015/07/warrior.jpg)
![[+]](https://www.chrisritchie.org/kilroy/archive/2019/07/risk_of_rain_2_engineer.jpg)
![[+]](https://www.chrisritchie.org/kilroy/archive/2016/04/division_helo_00.jpg)
![[+]](https://www.chrisritchie.org/kilroy/archive/2019/06/chipper_osha_curtain.jpg)
![[+]](https://www.chrisritchie.org/kilroy/archive/2015/11/deezer.jpg)
![[+]](https://www.chrisritchie.org/kilroy/archive/2019/07/division_2_echo.jpg)
![[+]](https://www.chrisritchie.org/kilroy/archive/2015/02/far_cry_view_00.jpg)
![[+]](https://www.chrisritchie.org/kilroy/archive/2019/06/rncp.jpg)
![[+]](https://www.chrisritchie.org/kilroy/archive/2017/07/dying_light_mother.jpg)
![[+]](https://www.chrisritchie.org/kilroy/archive/2019/06/borderlands_steele.jpg)
![[+]](https://www.chrisritchie.org/kilroy/archive/2015/12/nick_valentine_00.jpg)
![[+]](https://www.chrisritchie.org/kilroy/archive/2019/06/chipper.jpg)
![[+]](https://www.chrisritchie.org/kilroy/archive/2015/02/far_cry_items.jpg)